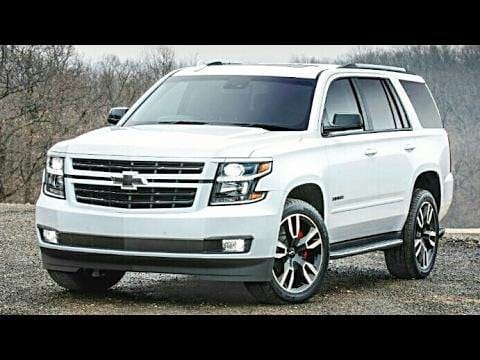
The Chevrolet Tahoe comes with different bells and whistles, all of which may make the full-size SUV all the more appealing. What you may find, however, is that not all of the models of the Tahoe are created equal. Some of these options are specific to the vehicle’s model, such as the headlights, but with a few simple steps, even you can modify it to fit your needs.
Modifying your vehicle, or modding, allows you to add or change features in your vehicle. Since the changes are entirely up to you, the sky is the limit, however, many people start with changing their headlights. Making even such a small change can brighten up the road as you drive and the vehicle as a whole.
For those who own a Chevrolet Tahoe LS/LT model years between 2015 and 2017, you’ll notice the headlight low beam bulb is the daytime running light. In the higher-end models like the LTZ, or models created after 2017 the daytime running light is the LED strip instead. This difference in location of daytime running light matters because when the DRL is on it runs at 9v instead of 12v. So, when your low beam is the DRL and is running at 9v it will shorten the life of the bulb by half. This happens for two reasons; the bulb is designed to be powered by 12v so the lower voltage makes the bulb work harder. And being on all the time, daytime and nighttime, will obviously create double the wear and tear. Changing the DRL from the low beam to the LED strip not only looks better, it doubles the life expectancy of your low beam bulb, saving you money on replacements.
Make your LS/LT Look like the LTZ
One of the simplest changes you can make, based on the steps described below, is to switch which headlights your Tahoe LS/LT uses as the daytime running lights. With a few simple changes, you can convert your Tahoe LS/LT from using the low beam headlights to the LED strips, just as the Tahoe LTZ does in every model year.
The change only takes a couple of steps and no more than 20 minutes, which means it’s something you can do at home without looking for outside help. You’ll end up with brighter lights and a spruced up looking vehicle.
Upgrade Your Headlights with an HID Kit
An HID, or high-intensity discharge, kit is a great way to upgrade the look of your car. HID’s are a relatively new type of light which started being offered in the 1990s but only for luxury cars. These lights use xenon bulbs instead of halogen bulb, which give off a bright white or bluish white light.
For owners of a Chevrolet Tahoe LS/LT, which still uses the low beam headlight as the daytime running light instead of the LED strip, this conversion is almost necessary to achieve the best results. The reason for this necessity is due to the fact that the regular low beam headlights used by the 2015 to 2017 Tahoe LS/LT run on 9-Volts. HID lights need 12-Volts to work properly.
If you’d like to spruce up your SUV with an HID conversion kit and benefit from the amazing light they provide, it’s best to follow the instructions below and convert your Tahoe LS/LT to run on the LED strip, just as the Tahoe LTZ. Once the conversion is done, you can rest easy that the HID conversion kit will work exactly as it should for a good for years without burning out ahead of time.
*** Disclaimer: Try at your own risk. I have provided some information and a method. Please be aware that you can break your vehicle. I am not responsible for what YOU do to your vehicle. That said, good luck modding. ***
Quick and painless. Takes 2 tools and about 20 minutes.
Tools: 5/16” Nut Driver Pick
Procedure:
Drivers side
1. Unplug the 8 wire connector (only 7 present) from the headlight.

2. Strip back the tape and wire loom protector about 3”
3. Using a small pick, gently remove the off-white pin separator from the connector (see picture below)

4. Gently using pick, unlatch the detent for #2 wire (yellow). Gently pull the yellow wire out bottom of the connection. Bottom of connector has numbers to indicate which wire is which.
5. Gently using pick, unlatch the detent for #6 wire (purple). Gently pull the purple wire out bottom of the connection. Bottom of connector has numbers to indicate which wire is which.
5a. #7 wire will be the same purple (grey on passenger) color. Do not remove this one.
6. Feed the purple wire into the #2 spot. Align the male end to match the other pins.
7. Feed the yellow wire into the #6 spot. Align the male end to match the other pins.
8. Ensure all of the pins are aligned. #8 will be empty. Gently insert the off-white pin separator into the connector. It will click into place and sit flush.
9. Put the wire loom cover back in place and put a few wraps of electrical tape as needed. Reconnect connector to the headlight.
Passenger side
10. Using Nut driver, remove the hose clamp from air box hose to intake silencer. Remove the MAF harness. In-clip the MAF wire harness from lower ledge of the air box (by cylinder #1
11. Remove the air box. It will come out without having to take lid off.
12. Rinse and repeat for Passenger side. The #6 wire will be gray. Exact same placements as drivers side will be utilized.
13. Re-install airbox and MAF harness.
Enjoy. With headlight switch in Auto. Now whenever DRL are needed, the LED strip will turn on. And when headlights are needed, the low beam and LED strip will turn on.
Hard to see. But the 'Burb is in gear and the LED strips are lit (ie: as the DRL).

Wiring schematics and the how/why this works. Of note: whenever the running lamps are on manually, you will now have the headlights on as well.
TLDR version: swaps the low beam and the DRL circuits. LTZ uses programming to do this in PCM
Premise: Make 2015-2017 LS/LT headlights act like LTZ headlights
LTZ vehicles have RPO code Y91 (MERCHANDISED PKG-LUXURY EDITION…ie: Upgraded Lights). This package is a different wiring harness and uses PCM programming to accomplish LED strip as the DRL.
Chevrolet - RPO Code X88 Cadillac - RPO Code Z75 GMC - RPO Code Z88
Chevrolet LS/LT vehicles use the -Y91 wiring schematic for X88 drawing. LTZ vehicles use the Y91 section to reflect their wiring harness.
Looking at the schematic, Chevy does some funky wiring. The lights are not operated like traditional. They operate as follows:
- In Park, the LED strip only
- In any gear, the low beam lights operate as DRL
- Light switch manually selected to on, LED and Low Beam are powered.
Currently when in any gear the low beam lights are used for DRL. The LED strip only operates when in Park, or when dark outside (in auto on switch) or when manually turned on.

From the Upfitter Manual To make the LED strip operate as DRL and the Low Beam only come on when required:
- Position #2 is the low beam
- Position #6 is the LED strip
- Swap the #2 and #6 pinouts in the X110 and X120 connector (headlamp plugs)
- That’s it. The vehicle will now operate the LED strip when DRL are commanded by the PCM. And when the PCM (auto position) or switch commands all lights, the low beams will energize.
Headlight Connector

Headlamp wiring Circuit

Low Beam Power Supply
